
Splash Back Tutorials

Which Product Is Best?
For any upstand areas where there is heat our floor & wall vinyl is best due to a higher heat resistance and stronger adhesive. With this being said we always advise testing samples prior as each splashback is made from different materials/textures & different heat will gather in different areas. You can ensure it works for your project!

Step 1- Samples
Step 1 - Purchase samples of your favourite designs & test them on your particular area to make sure the vinyl is suitable!
Different splash back areas vary with the amount of heat gathered so be sure to test samples first to make sure the vinyl stays stuck down over a period of time.
Our standard vinyl is heat resistant up to 85 degrees & our floor & wall vinyl is heat resistant up to 110 degrees. All our vinyl is non flammable. If the vinyl gets hotter than the degrees stated the vinyl may warp & become unstuck.
You can also make sure the vinyl sticks well to your individual tiles or walls by trying samples first!
IF you would like to stick our vinyl to a painted wall to create a splash back please make sure your paint type works with the vinyl, some paint types are made to be wipeable & will repel the vinyl. We suggest applying a sample to a discreet area & seeing how well it lasts over a period of time before purchasing the amount for your splash back. We also recommend our floor & wall vinyl when applying vinyl to painted walls.
Please keep in mind when applying vinyl to painted surface or varnished surfaces the vinyl may remove this upon removal.
Can i apply vinyl to recently plastered walls?
We reccomened to wait at least 6 weeks before applying vinyl to newly plastered walls, during the setting process of plaster if vinyl is applied to soon this may cause it to untick & peel away.
note- plastered walls must be painted with a suitable paint before vinyl application.
Step 2 - Measuring
Once you have tested your samples & chosen your design you will need to measure your area.
Our 1m x 65 cm size will fit most standard splash backs but always measure first to be sure!
If your area is an awkward size you can request a custom size from us.
To measure - calculate the width x length in CM.
You can also add on a few CM's each way to make sure you have enough to work with.

Step 3- Application
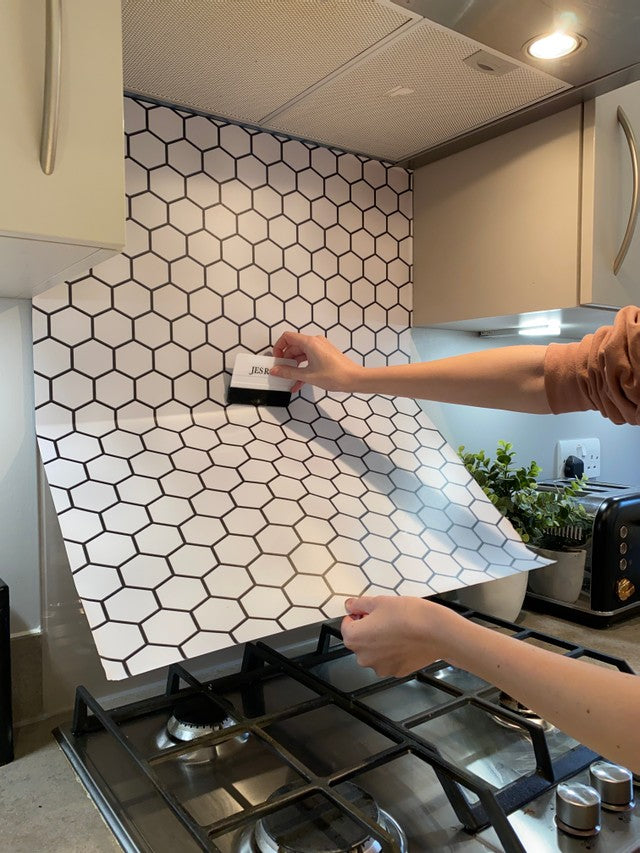
When it comes to applying your vinyl the trick is to apply small amounts at a time.
We suggest peeling no more than 2/3cm back first & then sticking the vinyl into place using your squeegee, by doing this you can make sure its on straight.
Next you just need to slowly keep peeling 2/3 cm of the backing paper off & sticking down.
We find holding the vinyl towards you like this image shows helps to avoid air bubbles forming or creasing.
Step 4- Continue applying..
Continue repeating step 3 until your splash back is finished!
IF you experience any air bubbles forming or creases in the section you are currently applying stop applying and peel back the effected area & you can peel back the vinyl and re apply it with your squeegee.
If you finish & still find some air bubbles simply pierce the top of the bubble with a sharp pin and use your squeegee to gently go around the air bubble pushing all air out of the hole you made.

Step 5- Trimming any excess.
The final step for your new splash back is to trim any excess vinyl off.
Simply use a sharp blade to remove any overhang not needed.
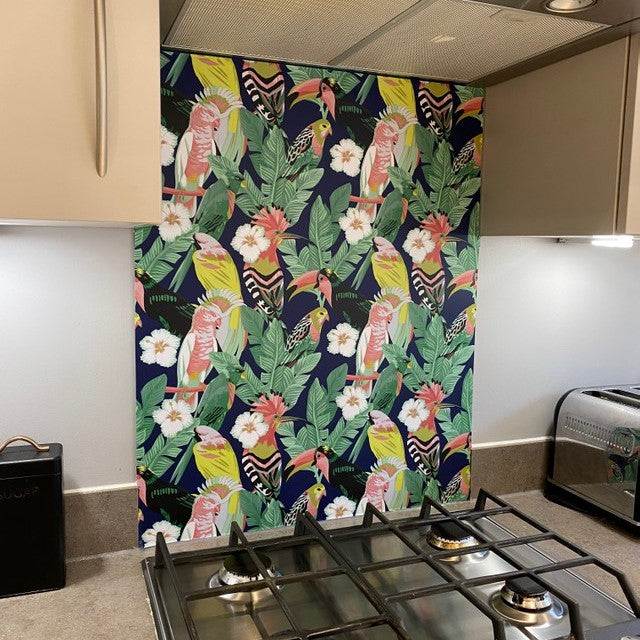
Once you have done this your new splash back is ready & complete!
If you would still like more help you can contact us hello@jesrose.co.uk or watch some of our video tutorials!